Category Archives: Cakes

Chocolate Buttercream Frosting

Chocolate Buttercream Frosting

September is here. I’m back at Pikes Peak Community College, teaching three English Composition courses. I’m also on call for five births (yes, I’m doing birth photography!). Needless to say, life is busy. Add in a bubbling, vivacious toddler and my days have been filling up at an ever-quickening rate. So for the time being, I’ll just be posting twice each week. If you absolutely need to see more baked goods and whole foods, you can always find me on instragram (@cakestand).

Chocolate Buttercream Frosting

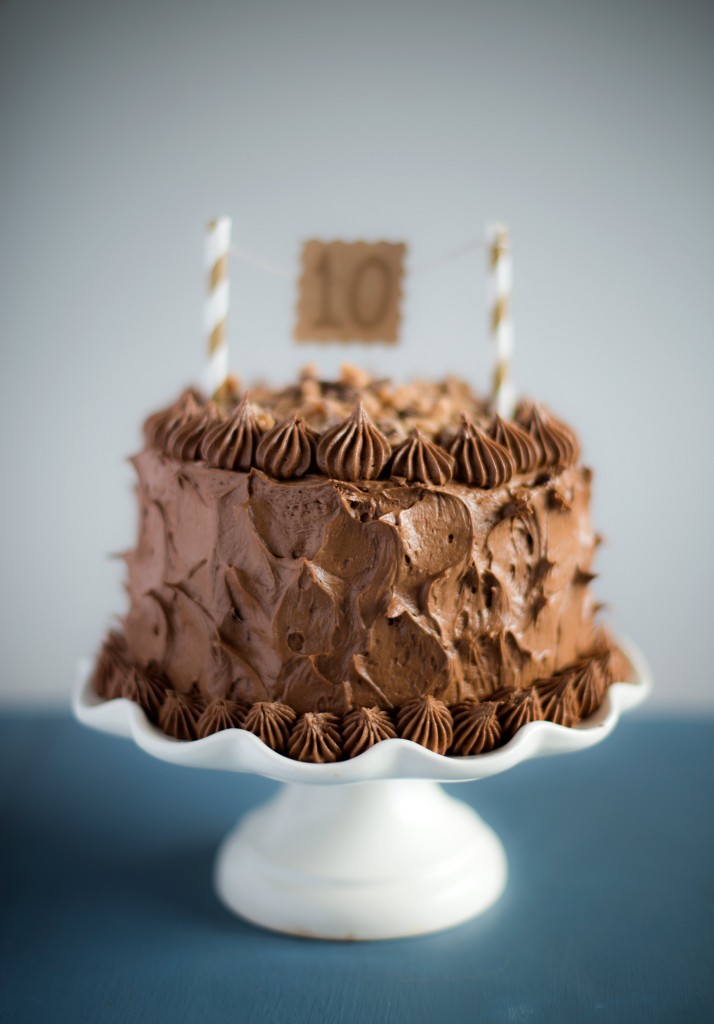
Last week, after a beautiful day photographing three women for the Breastfeeding Project, I drove home from Denver with one goal in my mind: to make my 10-year-old nephew a birthday cake. With only a couple of hours before we were set to meet for dinner, I knew I’d have to execute a stellar baking and decorating performance if Ben’s birthday cake was going to be a reality. I needed simplicity. I needed ease. I needed delicious. And so I fell back on a classic vanilla cake with a delicious chocolate buttercream frosting. When I have ample time, I love to make a traditional french buttercream…with egg yolks and corn syrup and granulated sugar. But when I need something sweet and simple that will decorate beautifully, I turn to this recipe: an easy buttercream made with only a few ingredients: cocoa, powdered sugar, butter, and a dash of milk. In under two hours (from start to finish!) we had this cake ready for Ben’s birthday celebration. It was enjoyed by all.

Chocolate Buttercream Frosting

Chocolate Buttercream Frosting

3 sticks butter, softened to almost room temperature

1 cup cocoa powder

5 cups powdered sugar, sifted

1 teaspoon vanilla

1/2 cup whole milk (for an even richer frosting, use cream)

In the bowl of your stand mixer, combine butter and cocoa. Using the paddle attachment, beat on medium speed until smooth. Gradually add in powdered sugar and milk (1 cup of powdered sugar, followed by 1-2 tablespoons milk). Run the mixer on low as you combine. After all milk and powdered sugar are added, stir in vanilla. Beat mixture on medium-high until light and fluffy (add more powdered sugar or more milk if needed). Frost on a completely cooled cake.

Roasted Fig Cake

Roasted Fig Cake

Fresh figs. I had my first three years ago on a hot summer day. Like many of us, my earliest memories of figs came in the form of those ubiquitous cookies. Imagine my wonder when I sliced my first fresh fig in half (they truly are one of the sexiest fruits I’ve seen) and imagine my delight when I took my first bite–subtle and sweet with that almost nutty texture.

Roasted Fig Cake

Fast forward and now we buy figs at the end of each summer. They’re one of the best ways to transition into fall. Baking with figs intensifies both their flavor and their sweetness. They roast beautifully and they were the perfect topping to my favorite French Yogurt Cake.

When I needed a last minute dessert on Sunday afternoon, this roasted fig cake came together effortlessly. We served it along with a scoop of ice-cream and Ryan’s pour-over coffee. And we vowed we’d make it again next summer, just as the days were rolling towards Autumn.

Roasted Fig Cake

Roasted Fig Cake

French Yogurt Cake

12 figs, stems removed and sliced into quarters

2 tablespoons melted butter

2 tablespoons honey

Sprinkle of flaky sea salt

Prepare cake and allow to cool. Preheat oven to 400 degrees Fahrenheit. Line an 8×8 inch baking pan with parchment paper or aluminum foil. Grease lightly. Combine sliced figs, melted butter, and honey in a bowl. Sprinkle with sea salt and stir gently. Roast for 15-20 minutes, until figs are soft and syrup begins to bubble. Spoon roasted figs on top of cake and serve.

Pistachio Caramel Ice Cream Cake

Pistachio Caramel Ice Cream Cake | Anecdotes and Apple Cores

As I mentioned, Ryan’s birthday fell on Wednesday this week. We spent the evening with a few friends and family, eating well and enjoying a cool summer’s night. And like with most good celebrations, Ryan’s face was illuminated by the light of birthday candles and an enthusiastic round of Happy Birthday.

Pistachio Caramel Ice Cream Cake | Anecdotes and Apple Cores

Growing up, Ryan requested an ice cream cake for his birthday most every year. So naturally, for his 30th, I wanted to make him something that was both nostalgic and sophisticated. When I found this recipe in a recent Kinfolk issue, I knew I’d hit upon the winner. Pistachio and salted caramel ice cream were natural choices for my husband’s taste buds, but this recipe can easily be adapted to suit your ice cream needs.

As you can see from the recipe instructions, this ice cream cake takes time. If you have it, it’s well worth the hours spent. Ryan’s Pistachio Caramel Ice Cream Cake turned out beautifully….and it tasted even better.

Pistachio Caramel Ice Cream Cake | Anecdotes and Apple Cores

Pistachio Caramel Ice Cream Cake

*From Kinfolk

1 quart/1 liter (32 fluid ounces/945 milliliters) salted caramel ice cream
1 recipe Snappy Chocolate (see recipe below)
9 ounces/255 grams chocolate wafer cookies, crushed
1 quart/1 liter (32 fluid ounces/945 milliliters) pistachio ice cream
1 recipe Chocolate Ripple (see recipe below)
1 recipe Cream Frosting (see recipe below)

Chopped Pistachios and Caramel Bar for topping

The morning before serving, place a 9-inch cake ring on a parchment-lined baking sheet in the freezer for at least 2 hours. Working quickly, tear the container off the vanilla ice cream. Use a large, sturdy knife to cut the ice cream into thick but manageable slices, the broader the better. Without letting the ice cream soften, firmly pack it into the prepared metal ring in an even layer. Try not to leave air pockets. Freeze ice cream in its ring until completely hard, around 1 1/2 to 2 hours.

In a medium bowl, stir the wafer crumbs into the Snappy Chocolate topping until the crumbs are uniformly damp. Again working quickly, pull the cake ring from the freezer. Spread the soft Chocolate Ripple mixture over the vanilla ice cream, and then press the coated crumbs over the chocolate. Freeze for another hour to set.

As before, remove the second ice cream flavor from its packaging. Cut it into slices and fit these into an even layer on top of the crumb layer. Freeze the cake in its pan, covered with plastic wrap, at least overnight (or up to a few days).

The day of serving, unmold the cake by warming the metal ring with a cooking torch (a hair dryer can also be used), then slipping it up and off the cake. Refreeze the cake for 30 minutes to set the surface. Decorate the cake as desired with Cream Frosting. If piping any decorations, first coat the cake with a base layer that covers the ice cream. Let this firm up in the freezer, and then pipe. This way all the frills and swags will have better footing upon which to adhere. Adorn generously with chopped pistachios and caramel bar. Use a warm knife to cut the cake.

Snappy Chocolate

5 1/4 ounces (150 grams) high-quality dark chocolate, chopped
1/8 teaspoon fine sea salt
3 1/2 ounces (100 milliliters) refined coconut oil

Melt the chocolate, coconut oil and salt in a small saucepan over low heat, stirring often until glossy. Set aside at room temperature until needed (it should be pourable, but not at all hot when used).

Note: Using refined coconut oil means the finished topping will have less of a coconut taste, making it more accommodating in regards to flavor pairings and use. If that’s not a concern, feel free to use virgin instead.

Makes about 1 cup

Recipe: Chocolate Ripple

2 1/2 ounces (70 grams) high-quality dark chocolate, chopped
1 tablespoon (15 milliliters) light corn syrup
2 1/2 ounces (75 milliliters) heavy cream
1/4 teaspoon vanilla extract

Place the chocolate and corn syrup in a heatproof bowl. In a saucepan over medium heat, warm the cream to barely below simmering. Pour the cream over the chocolate and let stand for 5 minutes. Add the vanilla. Starting from the center, stir the cream into the chocolate until the mixture is smooth. Let stand at room temperature, stirring regularly, until thick and spreadable.

Makes enough for a 9-inch (23-centimeter) cake

Recipe: Cream Frosting

1 1/2 cups (360 milliliters) heavy cream
1/2 teaspoon vanilla extract
2 tablespoons (30 grams) superfine sugar
1 teaspoon powdered gelatin
2 tablespoons (30 milliliters) milk

Combine the cream, sugar and vanilla in a chilled bowl and beat to firm peaks with a large wire whisk or electric mixer. In a small saucepan, soak the gelatin in the milk. Once the milk has been absorbed, heat the gelatin over low heat until it melts. Quickly but gently, fold the gelatin into the whipped cream. Use immediately as is, or tint it with a food coloring of your choice.

Note: This recipe may be doubled for more elaborate decorating.

Makes about 3 cups

Cake Doughnuts

Cake Doughnuts

Today is a busy day. I have a photo shoot scheduled at eleven. A meeting at the bank around two. There is no food in the house for lunch, which means I also need to squeeze a trip into Whole Foods between Lucy’s naps and are other engagements. On mornings like today, I wake up and struggle to remember what “free time” looked like in my life.

I’m not complaining because I feel blessed with a wide set of interests and passions. I’m happy I have such a rich circle of friends. But I am wondering: how do I foster stillness in my days? Because last night, after Ryan had fallen asleep, I held Lucy in my arms for what must have been an hour. She slept peacefully on my chest and I just watched the minute movements of rest: the twitch of an eyebrow, the gentle rise and fall of the torso, the sweet sucking of her lips. I need more moments like this, I thought to myself. No agenda. No plans. Just an hour to watch my daughter in all of the wonder of her childhood.

Cake DoughnutsOne thing that always slows me down is baking. I bake when I need time to decompress, to think, to grieve, to heal. On Tuesday, my eleven-year old niece came over after a rough day. I had spoken to my sister a few hours earlier, and so I  already knew the background of the situation. After several minutes of “talking it out,” I knew we needed to do something with our hands. We needed a physical activity that occupied both our bodies and our minds, allowing the uneasiness of the situation to take a back seat. And so we made these donuts. Somehow, with Lucy strapped on my chest, we found a way to make the dough, to cut the shapes, and then to fry the donuts. (I would have found this entirely impossible my first month of motherhood).

And friends, these cake doughnuts did us all good. They fry up beautifully (and this comes from a woman who as of two weeks ago was TERRIFIED of frying anything). These aren’t particularly sweet. The exterior is slightly caramelized and crunchy while the interior is both moist and dense. Exactly what you want from a cake doughnut. As with all fried food, these are best enjoyed the day, no the hour, they’re made. So perhaps Saturday or Sunday morning, you’ll find an hour or two to make a batch of homemade cake doughnuts. And if you do, I hope you love them as much as we do.

Cake Doughnuts

Cake Doughnuts

1 cup sugar

4 teaspoons baking powder

1 1/2 teaspoons salt

2 eggs

1/4 cup unsalted butter, melted

1 cup whole milk

4 cups all-purpose flour

Oil (for frying)

In a large bowl, whisk together the sugar, baking powder, and salt. Add eggs, milk, and melted butter. Beat until smooth. Add flour and stir with a large wooden spoon. The dough should be soft and sticky but firm enough to handle. If necessary, add an additional 1/2 cup flour). Cover bowl with plastic wrap and allow to chill for 30-60 minutes.

Remove dough from refrigerator and begin to heat about 1 inch of oil to 360 degrees Fahrenheit in a large metal skillet. You can tell oil is hot enough if  a small piece of bread fries to a golden brown within ten seconds.

Working with half the dough at a time, roll it out on a floured surface to 1/2 inch thickness. Cut out circles using a doughnut cutter or one large and one small biscuit cutter. Gently drop the doughnuts into the hot oil (I fried about three at a time). Flip them over as they puff and turn them a few times as they continue to fry. They should reach a deep golden brown within 2-3 minutes.

Remove doughnuts with a slotted spoon and allow them to drip on a wire cookie rack (with paper towels beneath). If desired, you can douse them with cinnamon-sugar or a simple frosting (1 cup powdered sugar with 1-2 TBSP cream). Best enjoyed fresh.

Blueberry Pound Cake

Blueberry Pound Cake | Anecdotes and Apple Cores

I celebrated my five year anniversary and my first Mother’s Day this weekend. Needless to say, I felt very loved.  I understand, like never before, how much my own mother did for me. The years of patience, of guidance, of love. I’ve only known my own daughter for ten months, and yet the love I feel for her is almost all-consuming. I can only imagine what that love feels like for a daughter of twenty, thirty years. My mom is my best friend, and I’m so happy that we were able to celebrate together yesterday.

Moms

Ryan and I are lucky enough to live near both of our moms (we moved back home for a reason!). Yesterday, we had our families over for a Mother’s Day brunch. Freshly baked baguettes, smoked turkey and ham, swiss cheese, tomato basil soup, and fresh fruit made the snow, yes snow, more bearable. And this blueberry pound cake served as the perfect dessert.

Blueberry Pound Cake | Anecdotes and Apple Cores

Dense and moist, this pound cake slices beautifully (to a food photographer, slicing capabilities matter). And when I say it’s my favorite pound cake recipe, please know I’ve tried dozens. What I love about this recipe is that it requires both butter and cream. And please don’t skimp on the times listed in the recipe. You want to cream the butter and sugar for at least five minutes and then allow the batter to whip for an additional six. You won’t regret the extra time in the mixing bowl. I tossed a cup of fresh blueberries in flour and then folded them into the batter. The berries rose to the top as the pound cake baked, creating a beautiful berry crown.

Blueberry Pound Cake | Anecdotes and Apple Cores

Blueberry Pound Cake

2 sticks (1 cup butter) room temperature

3 cups sifted cake flour (sift before measuring)

3/4 teaspoon salt

3 cups granulated sugar

7 large eggs, room temperature

2 teaspoons vanilla

1 cup heavy cream

1 cup fresh or frozen blueberries

2 TBSP all-purpose flour

Do not preheat oven. Line two standard loaf pans with parchment paper.

Stir together sifted flour and salt into a bowl. Beat together butter and sugar in the bowl of your stand mixer at medium-high speed until pale and fluffy, about 5 minutes. Add eggs, one at a time, beating well after each addition, then beat in vanilla. Reduce speed to low and add half of flour, then all of cream, then remaining flour, mixing well after each addition. Scrape down side of bowl and then beat at medium-high speed for an additional 6 minutes. Batter will become creamy and satiny. Toss blueberries in all-purpose flour and gently fold into batter.

Spoon batter into prepared pans and rap against counter once or twice to eliminate air bubbles. Place pans in cold oven and turn oven on to 350 degrees Fahrenheit. Bake until golden brown and a wooden pick or skewer inserted in middle of cake comes out with just a few crumbs adhering, about 1 hour to 1 hour and 15 minutes. Cool cake in pan for 30 minutes before removing. Allow to cool completely before slicing.