Category Archives: Cakes

Strawberry Shortcake Sandwiches

IMG_0509

So I’m a list maker. Type A on most days of the week. With Lucy’s arrival just around the corner, Ryan and I have been trying to savor these last few days. “Trying” is the operative word. Because even though I know we won’t ever have this time again (just him and me), I’m also plagued with practicality. So when Friday night rolls around, I’m often torn between going out to see a movie with Ryan…and organizing my bedroom closet.

This simply can’t be.

So with a little more than 30 days to go before my due date, I came up with a list. A list of fun (and even a few practical) activities I’d like to do before Lucille Amelia is born. Now, of course, I realize that she could come at any time, and I’m pretty sure she doesn’t care if the list is completed. But having these goals motivate me to leave the house, to enjoy time with my husband, and I’m happy to say we’ve already been crossing items off our list.

IMG_0520

1. Dine at two NICE restaurants. This means at least 3 dollar signs on Yelp.

2. Go to a show. Ryan and I met at an Architecture and Helsinki show many years ago. We’re hoping to catch David Ramirez at the beginning of June!

3. Go see a movie. Maybe Great Gatsby? There aren’t too many good films out right now…but we need to do it while we can!

4. Hike in the mountains. We live in Colorado. No excuses.

5. Finish reading a novel. I’m about 100 pages into the Marriage Plot. Totally attainable.

6. Enjoy a leisurely breakfast at Adam’s Mountain Cafe. Already done!

7. Go to Boulder’s Farmer’s Market and pick up doughnuts from Dizzy Doughnuts.

8. Invite my sweet niece Halley over for a sleepover.

9. Host a dinner party.

10. Go out to eat with friends (at least twice). One down, one more to go!

11. Finish Lucy’s baby book. I told you there were some practical items on this list.

12. Print and organize pictures from Paris. Another.

13. Host a party.

14. Hang pictures and shelves in nursery.

15. Work in the front yard with Ryan. Pick out flowers and bushes.

16. Write. Daily.

17. Spend time with our siblings. Even if it means a long phone date!

18. Spend time with our parents. We have great ones.

19. Paint rocker with mom.

20. Go on a picnic.

IMG_0536

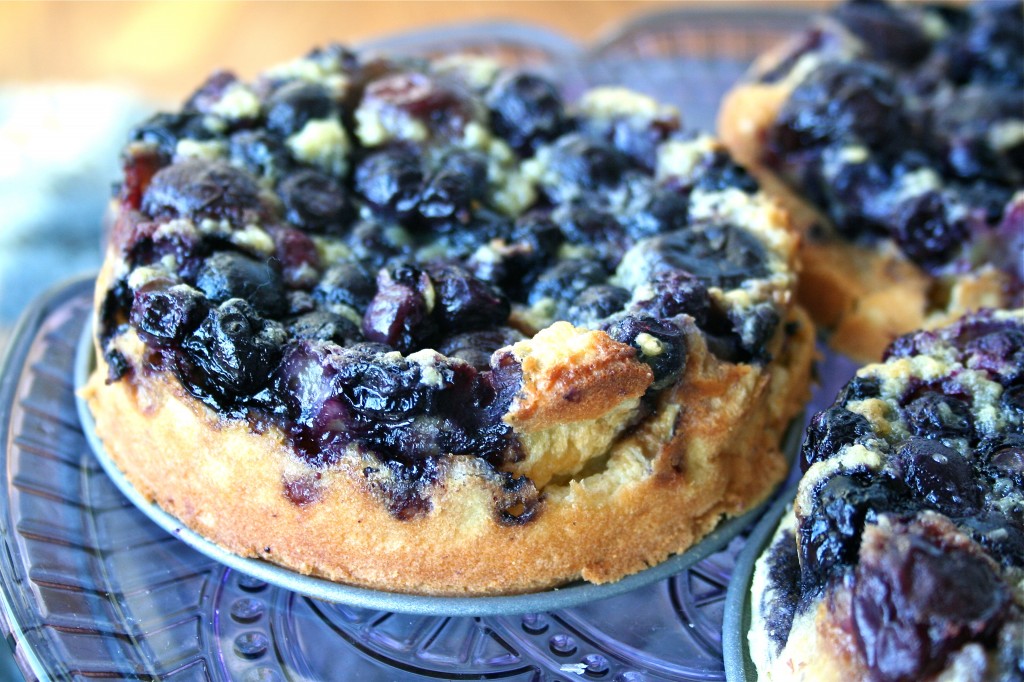
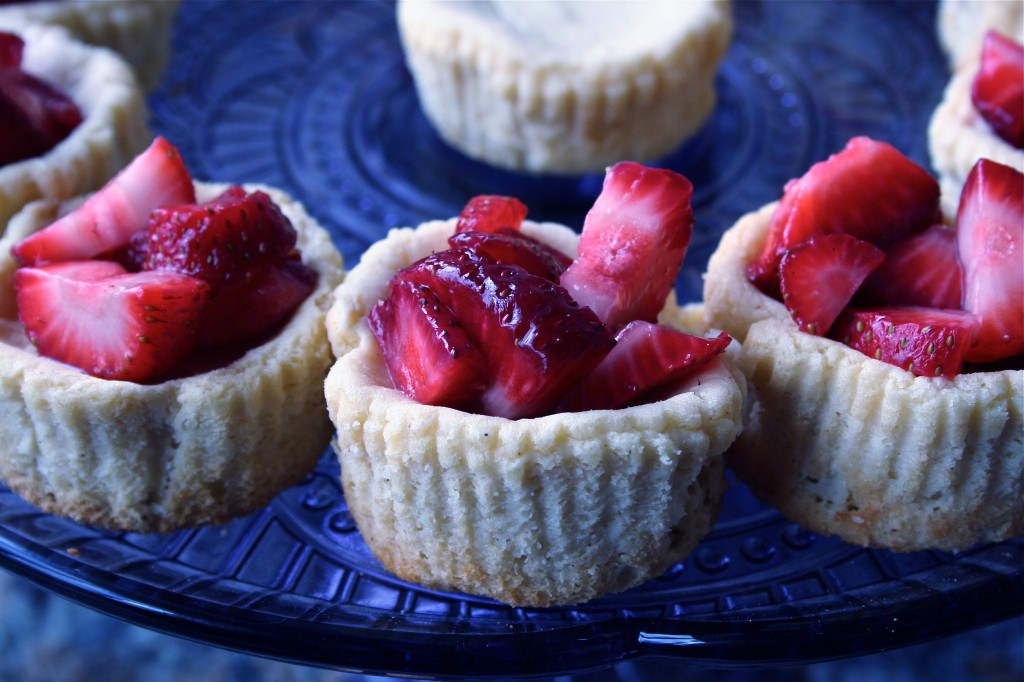
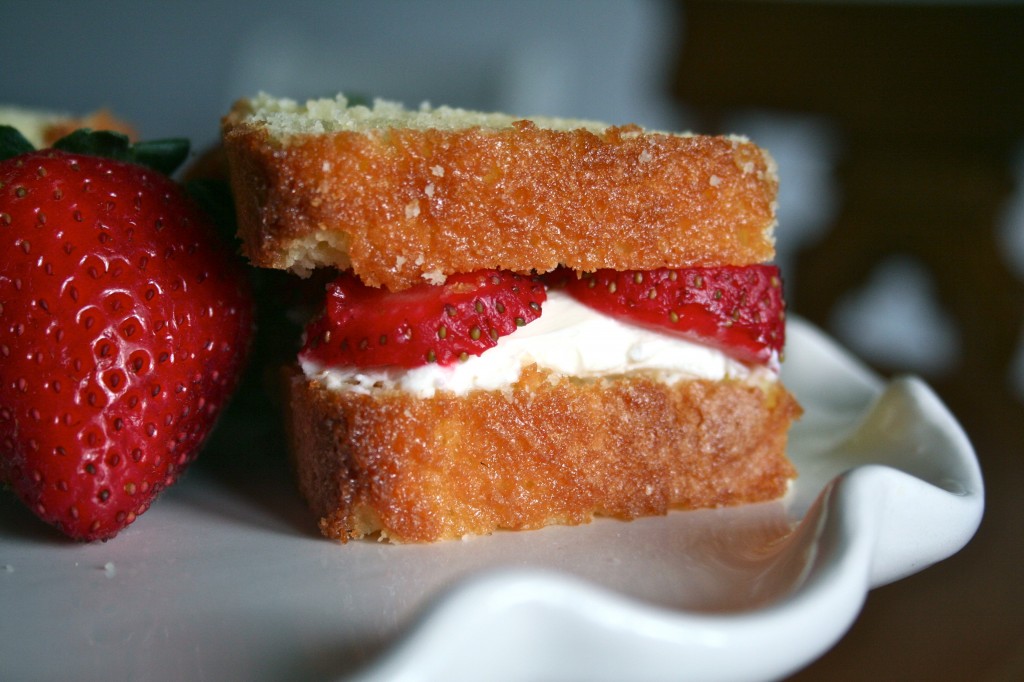
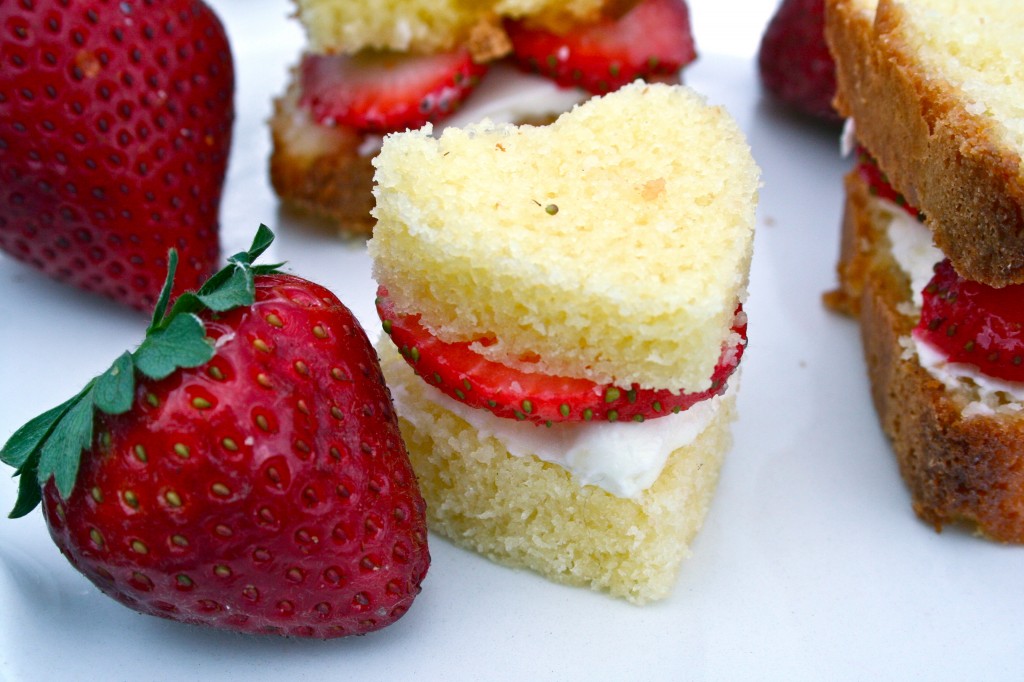
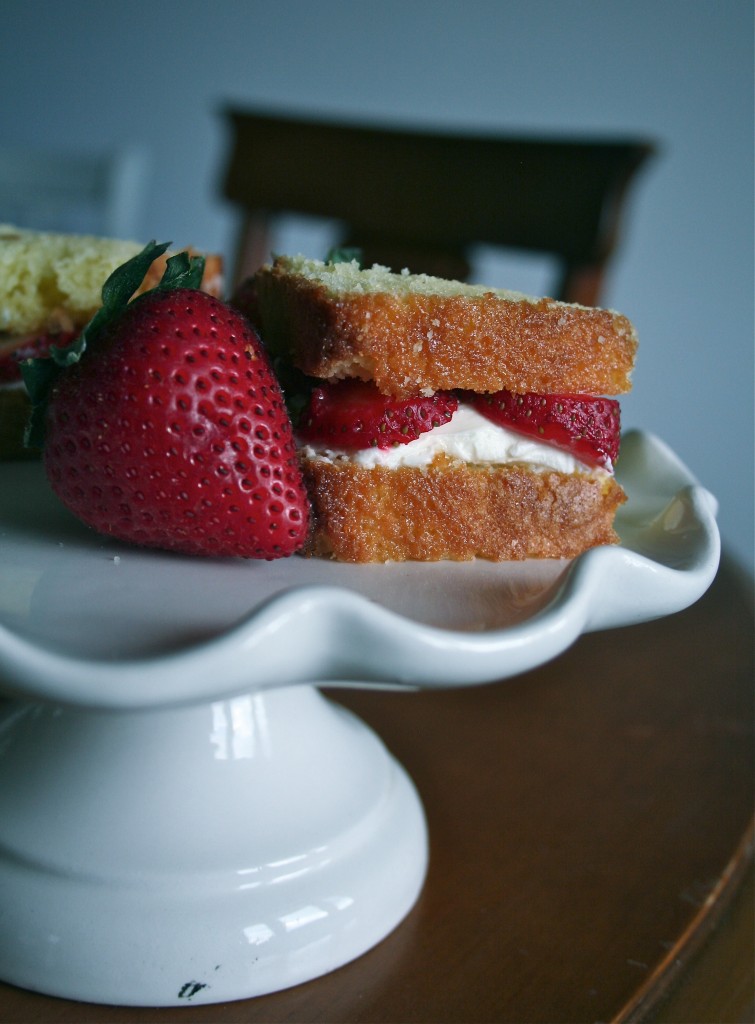
As you saw above, I really want to go on a picnic. The weather is perfect right now in Colorado, and I can’t imagine a better way to spend a Saturday afternoon. Picnic fare is fun to make, fun to eat, and fun to share. I love strawberry shortcake, and I wanted to make tiny sandwiches we could take with us on our expedition (because bowls of whipped cream don’t travel well. The result were these pretty little tea sandwiches. Perfect for picnics or for parties or for a lazy afternoon.

IMG_0505

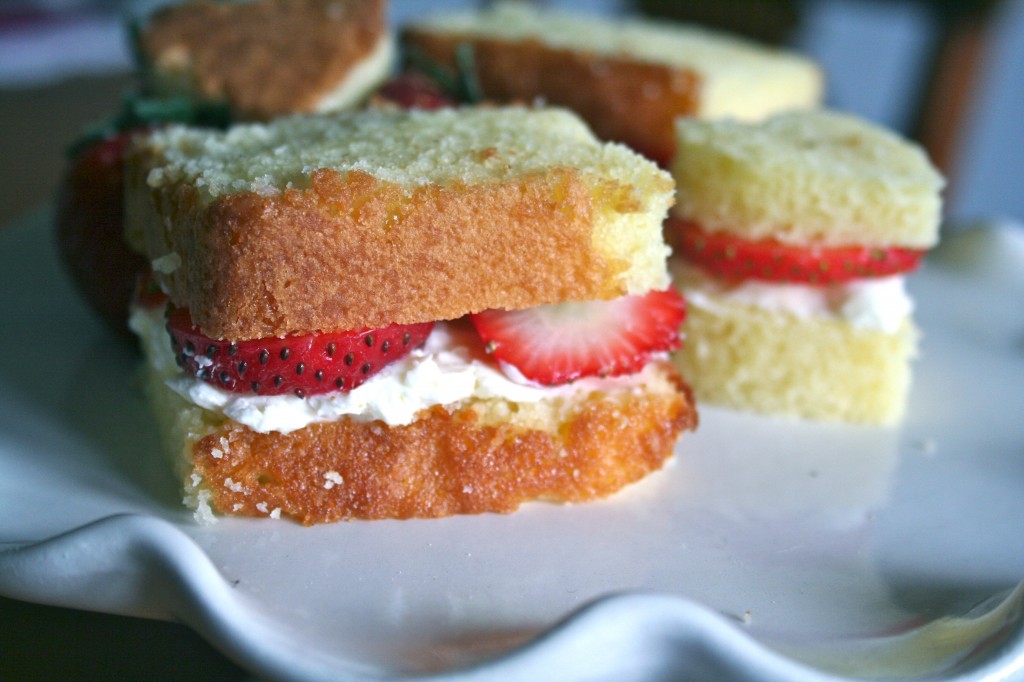
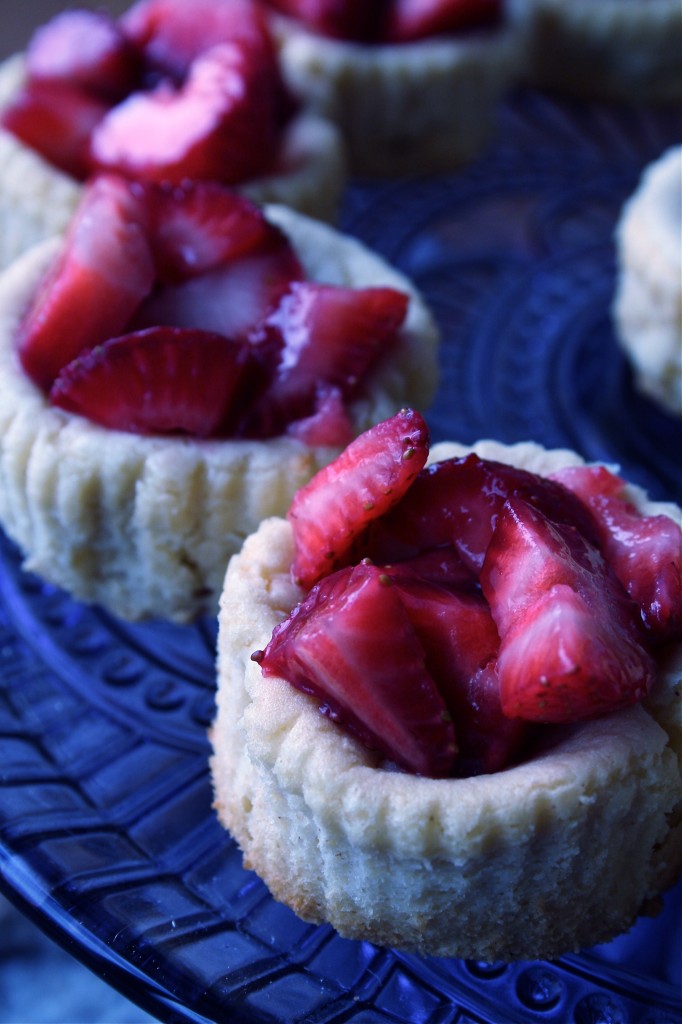
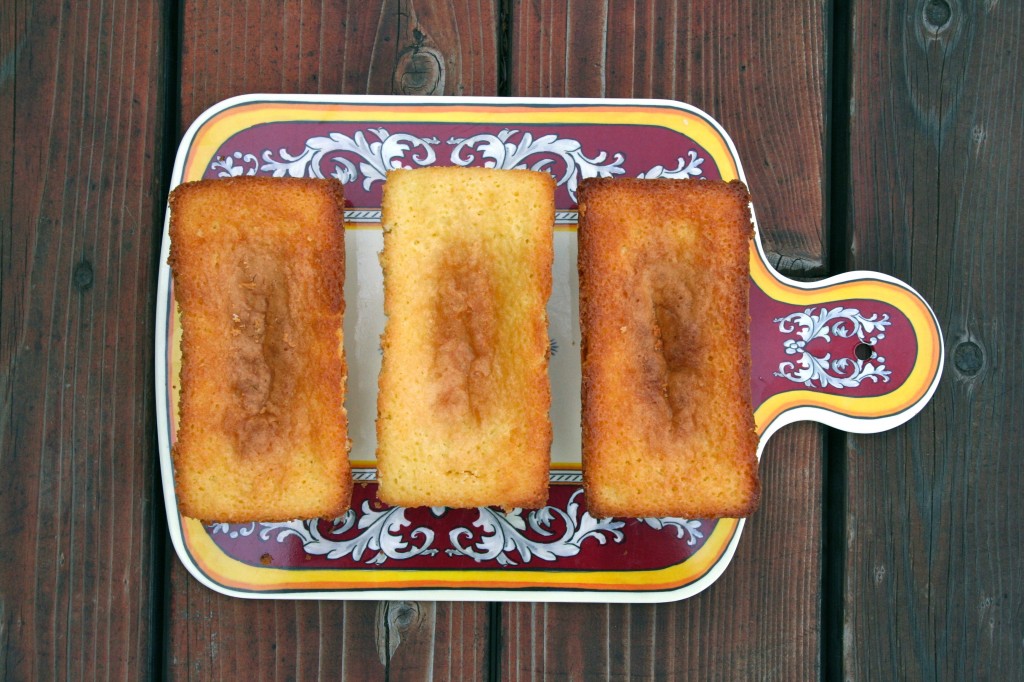
If you want to be ambitious, you can make pound cake from scratch. I’ve shared a REALLY GOOD recipe. One that won’t disappoint. But I promise I won’t judge if you pick up a loaf from the store. We’re all busy (and as I approach motherhood, I realize this more and more!). I spread a thick layer of mascarpone cheese whipped with honey over one piece of pound cake and layered cut strawberries on top. The mascarpone is just slightly sweet, adding ideal balance to this summer treat. If you’re not traveling with the sandwiches, you could serve them open-faced. But, if you’re going on a picnic I recommend you place that top layer over the strawberries and cream.

IMG_0512

Strawberry Shortcake Sandwiches

Poundcake (see recipe below)
1 carton strawberries, sliced thin
1 cup mascarpone cheese (softened…allow to sit at room temperature for at least 30 minutes)
2 TBSP powdered sugar or honey (I prefer honey, but powdered sugar would also add the right amount of sweetness)

Whip together the softened mascarpone cheese and either honey or powdered sugar. Add more sweetener to taste. Cut standard shortcake (loaf pan size) into 1/2 inch, uniform slices. Cut each slice in half. Spread a thick layer of mascarpone cheese over one slice. Arrange cut strawberries over cheese. Place another slice on top. Repeat with remaining slices. Yields around 20 tea-size sandwiches.

Best Poundcake Recipe (From Epicurious)

2 sticks (1 cup) unsalted butter, softened, plus additional for pans
3 cups sifted cake flour (not self-rising; sift before measuring)
3/4 teaspoon salt
3 cups sugar
7 large eggs, at room temperature 30 minutes
2 teaspoons vanilla
1 cup heavy cream

Put oven rack in middle position, but do not preheat oven.

Generously butter two standard loaf pans and dust with flour, knocking out excess flour.

Sift together sifted flour (3 cups) and salt into a bowl. Repeat sifting into another bowl (flour will have been sifted 3 times total).

Beat together butter (2 sticks) and sugar in a large bowl with an electric mixer at medium-high speed until pale and fluffy, about 5 minutes in a stand mixer fitted with paddle attachment or 6 to 8 minutes with a handheld mixer. Add eggs 1 at a time, beating well after each addition, then beat in vanilla. Reduce speed to low and add half of flour, then all of cream, then remaining flour, mixing well after each addition. Scrape down side of bowl, then beat at medium-high speed 5 minutes. Batter will become creamier and satiny.

Spoon batter into pans and rap pan against work surface once or twice to eliminate air bubbles. Place pans in (cold) oven and turn oven temperature to 350°F. Bake until golden and a wooden pick or skewer inserted in middle of cake comes out with a few crumbs adhering, around one hour. Cool cake in pan on a rack 30 minutes. Run a thin knife around inner and outer edges of cakes, then invert rack over pans and invert cakes onto rack to cool completely.

PS. You’ll only need one of two pound cakes for the the shortcake sandwiches.

Monet

Anecdotes and Apple Cores

Blueberry Clafouti

IMG_0271

As you know, we had a small scare last week. Or, more accurately, I had a small scare last week (Ryan remained valiant through it all). When we went in for our biweekly check-up at the OB, she mentioned that my stomach hadn’t grown since she’d last seen me. She scheduled an ultrasound to make sure that our Lucy was still growing, receiving nutrients from the placenta. She tried to assure me that likely everything was just fine. But I didn’t (and still don’t) like the word “likely.”

Ryan and I had a difficult time conceiving. We were in the office of a fertility specialist when we found out we were pregnant. My first twelve weeks were touch-and-go. My progesterone levels dropped around 8 weeks, causing me to bleed and sending us to the ER. When we finally made it to the second trimester, I felt such relief and gratefulness. When we saw Lucy at our anatomical scan in January, I cried. The ultrasound tech told us again and again, “She’s just perfect.”

IMG_0252

So when I thought there might be something wrong, when I feared my body had stopped doing what it was supposed to do, I panicked. Thankfully, I had my stellar husband, a few good friends, and my sweet mom to reassure me: everything’s going to be alright.

And yesterday morning, we confirmed just that: everything with Lucy is fine.

I201305021029570003

Not only is she still growing, but she’s a few days ahead of schedule, weighing almost 5 lbs. She’s nestled down into my pelvis (ready to go into the world!) and she’s still keeping her hands close to her sweet face. Wonderful reassurance. Just what I needed to carry us through these last weeks.

And so after we got the good news, I came home and baked these pretty blueberry clafoutis (isn’t this the best word to say aloud?). Clafoutis are a simple, rustic french dessert that showcase seasonal fruit. The batter is decidedly eggy, which makes it ideal for brunch or dessert. If you know how to use a bowl and a whisk, you can make a clafouti. Easy and beautiful and delicious, they’re a must-make this Spring and summer.

IMG_0277

Blueberry Clafouti

*From King Arthur Flour

3 cups fresh or frozen blueberries

3 large eggs

3/4 cup milk

1/4 teaspoon salt

2 tablespoons butter, melted and cooled

1 teaspoon vanilla extract

1/4 teaspoon almond extract

1/2 cup granulated sugar

3/4 cup White Whole Wheat Flour

Preheat the oven to 350 Fahrenheit. Lightly grease a 9 x 2-inch round cake pan, or a 9-inch pie pan at least 1 1/2 inches deep. Place the blueberries in the pan. Note: I used three mini spring foam pans. If you use a spring foam pan, be sure to place a cookie sheet underneath as the batter will seep out.

In a medium bowl, whisk together the eggs, milk, salt, melted butter, vanilla, almond extract, and sugar. Whisk in the flour, stirring till most of the lumps are gone. Pour the batter over the fruit.

Bake the clafouti for 45 minutes, until a cake tester inserted into the center comes out clean. Remove it from the oven, and serve it in wedges, warm or at room temperature. A dab of whipped cream is entirely appropriate. Yield: 8 servings.

Monet

Anecdotes and Apple Cores

Honey Sweetened Mini Cheesecakes

IMG_0050

We only have nine more weeks before D-Day. It’s hard to believe I’m now in the single-digit countdown! Of course, I’m well aware that little Lucy will make her appearance when she’s ready (which most likely will not be on June 19th) but the imminence of her arrival is exciting. We’re also settling into our house, which makes me even more eager to welcome the newest member of our family. She has her own room–painted a calm, light green–and her crib is set against the wall. I should have pictures to share soon…but right now, there are still a few too many boxes to consider her nursery done.

IMG_0053

I’ve also been baking more now that I’m in my own kitchen, with my own mixing bowls and baking pans. Homemade doughnuts happened on Sunday, and these petite strawberry cheesecakes were born on Monday afternoon. I happily used a combination of McCormick vanilla and almond extracts, resulting in a subtle, more sophisticated flavor profile. And to put these mini cheesecakes over the top? I used local honey instead of granulated sugar. With our little one fast approaching, I’m trying to bake as many naturally sweet treats as possible. The local honey paired with the sweet strawberries put these cheesecakes into our “favorite” category. I brought them to a party on Monday night…and they were quickly and happily devoured.

IMG_0055

Cheesecake can be intimidating. When I went to make this recipe, I found forum after forum espousing complicated methods to achieve cheesecake magic. No doubt, these tips and tricks are worth exploring, but I’m happy to say that this is a simple and easy recipe. One you can make on a Monday afternoon, without the use of a water bath, a spring-foam pan, even a kitchen aid mixer. And because this recipe calls for honey (not granulated sugar) you can feel better about serving these to your kids (or eating a few extra yourself). Wouldn’t these be a lovely Mother’s Day treat?

So buy a bottle or two of almond and vanilla extract and find a good source of local honey. These come together in no-time, and they look oh-so-pretty on a cake stand or a decorative plate. But be warned, they won’t last long. These were gone before the sun had fully set, and I found myself wishing I had made a double batch (just so I could fulfill a late-night pregnancy craving).

IMG_0051

Honey Sweetened Mini-Cheesecakes

2 (8 oz) packages cream cheese

1/2 cup local honey

2 eggs

2 Tablespoons McCormick® Pure Vanilla Extract

2 Tablespoons McCormick® Pure Almond Extract

12 vanilla wafers

Strawberry Compote

1 1/2 cup chopped strawberries

3 Tablespoons local honey

Preheat oven to 325 degrees Fahrenheit. Line a 12-tin muffin pan with paper cups. Place one vanilla wafer inside each muffin tin. Set aside.

In a medium bowl, beat together softened cream cheese and honey until smooth and creamy (about 3-5 minutes). Add in eggs, one at a time, mixing well after each addition. Stir in McCormick® Pure Vanilla Extract and McCormick® Pure Almond Extract. Spoon batter into prepared muffin tins, filling each about 2/3 full. Bake in preheated oven for 22-24 minutes, until cheesecake has just begin to set. Remove cheesecakes from oven and allow to cool in pan for 10 minutes before removing to a wired rack to cool completely (about 30 minutes). Allow to fully chill in refrigerator before serving (at least four hours).

Meanwhile, combine chopped strawberries with 3 tablespoons of honey. Allow to sit in refrigerator for at least one hour before spooning on top of cooled cheesecakes.

Monet

Anecdotes and Apple Cores

No-Frosting Strawberry Coconut Cake

IMG_9584

There are one thousand lines on my to-do list. We left for Austin yesterday, and I’ll spend this week defending my thesis, enjoying my friends, and celebrating with family. But I still need to spend a few hours formatting my 130-page creative manuscript (I have long been known to procrastinate). And did I mention? Ryan and I bought our very first house on Friday, which means I’ll have rooms to unpack, organize, and decorate as soon as we get home. I left Colorado in a frenzy, and I still have at least three dozen more thank-you cards to write.

IMG_9603

But you know what? Baking this cake on Saturday, one day before our departure, was exactly what I needed. A simple task that occupied a few hours of my afternoon and left our kitchen smelling like toasted coconut and caramelized strawberries. If you have a spring party on the horizon, I’d highly suggest you consider this cake. Not only is it rich and moist, but you don’t have to bother with frosting (which not only requires more ingredients, but also more time). Quite frankly, this is one of my most favorite cakes…and for those of you who don’t know…I made wedding cakes in Austin for a living. So I’ve tried my share of recipes and flavors.

IMG_9586

And because I’m becoming more and more adept at procrastination, I also made another inspiration board. Little Lucy is due in June, just a few days shy of what’s called the Full Strawberry Moon. We don’t know exactly when she’ll make her appearance, but I take stock in the old wives tales about labor and the lunar cycle. Either way, I’m sure she’ll love strawberries as much as Ryan and I do.

ccb3271fc89a8ead31f8eafa83922ab1

No Frosting Strawberry Coconut Cake

3/4 cup unsalted butter, room temperature
1 3/4 cups sugar
4 eggs
1 teaspoon vanilla
2 cups all-purpose flour
3/4 teaspoon baking powder
1/4 teaspoon salt
1 cup shredded coconut (divided)
3/4 cup coconut milk
1/2 to 3/4 cup chopped strawberries

Preheat oven to 325 degrees Fahrenheit. Grease a nine-inch square pan with butter and line with parchment paper (lining is optional…but makes removing so much easier)

In a medium bowl, whip butter with sugar until light and fluffy, about seven minutes. Beat in eggs, one at a time, until fully incorporated. Stir in vanilla.

In a small bowl, whisk together flour, baking powder, salt, and 1/2 cup coconut. Fold dry ingredients into butter-sugar mixture, alternating with coconut milk. You should begin and end with flour mixture. Stir until just combined.

Spread batter into prepared pan and sprinkle with chopped strawberries and 1/2 cup of coconut. Bake in preheated oven for 45-50 minutes until lightly golden and a toothpick inserted into the center comes out clean.

Monet

Anecdotes and Apple Cores


Naturally Sweet Carrot Cake

IMG_9109

Hard to believe, but my second trimester is coming to a close. Ryan and I completed our hypnobirthing class on Monday, and we found a sweet doula, Sarah York, over the weekend. After much thought and debate and prayer, we’ve decided to give birth at the hospital. Thankfully my OB is a family friend and lives just three houses up from my parents. Even more reassuring, she had natural births with all four of her children and is excited about my choice to avoid as much medical intervention as possible. Perhaps next time around, we’ll consider doing a home birth or making the drive to Denver, but since there is so much I don’t know about labor and delivery, I believe the hospital will be the best atmosphere for Lucy’s arrival.

That being said, I’m working on a birth plan that is both specific and purposeful. We talked about birth trauma in our hypnobirthing class, and the concept has guided my thinking as I consider labor and delivery. We often forget that babies are an equally important part of the birthing process. Their tiny, flexible bodies work down through the birth canal, leaving behind the safety and security of the womb. It is their lungs that must take those first gasps of air and their eyes that lock onto the faces of their mothers. As we enter into the third trimester, I’m preparing my body and my soul for a peaceful and joyful birth. One in which Lucy feels no fear. Now of course, so many different scenarios can occur and birth rarely happens the way we expect. But I do know that my mind and my soul can hold onto the promise of hope and peace no matter what turn my birthing may take.

IMG_9158

As I mentioned last week, my appetite has grown IMMENSELY. I feel like I need to eat every two hours…and not just a granola bar…a hefty meal. Last night, I ate an apple, peanut butter, a whole wheat bagel, two slices of cheese and cinnamon raisin bread. All of this consumed after a full dinner of pasta and shrimp. She’s growing, I’m growing, so I’ll keep on eating as much healthy and real food as my body demands.  Thankfully, I haven’t had any cravings for cake or cookies or ice-cream. I tend towards more savory food or treats that have been naturally sweetened, like this Carrot Cake.

We had a few friends over for dinner on Saturday night, and I wanted to offer them both a healthy and not-so-healthy dessert option. This carrot cake seemed like a natural choice for the beginning of March. As I grated carrots and chopped dates, I felt Lucy’s foot along the right side of my abdomen (her very favorite place to remind me she’s there, inside me). I gave her a gentle rub and continued on with my mixing bowls. Now, as a baker, I read dozens of recipes each month. I spend more time baking than most people spend cooking. So I know that 4 oz. of butter is equivalent to one standard stick. However, pregnancy brain has been a definite symptom this trimester, and on Saturday, when I read 4 oz. of butter in the recipe, I cut my stick in half, only melting 2 oz.

IMG_9117

As often happens, I realized my mistake mid-bake. The loaves were already rising in the oven, and there was nothing I could do but hope that they still tasted okay. Much to my delight, the carrot cake loaves were still moist and light, not too greasy but flavorful. Not only had my mistake not been fatal, but I actually preferred the carrot cake with 1/2 as much butter as the original recipe calls for.

Now, as a word of caution, this is a lovely carrot cake recipe, but there is absolutely no sugar, no honey, no maple syrup. Ripe bananas and dates provide all the sweetness. So if you’re looking for a classic carrot cake, I’d find another recipe. But if you’re like me, this naturally sweet carrot cake will become a favorite. It’s wholesome, moist, and full of texture and flavor. A real winner in my book…and I think Lucy likes it too.

IMG_9115

Naturally Sweet Carrot Cake

Adapted from 101 Cookbooks

2 cups whole wheat pastry flour
2 1/2 teaspoons baking powder
1 1/2 teaspoons cinnamon
3/4 teaspoon fine grain sea salt
3/4 cup finely chopped walnuts
2 ounces unsalted butter, heated until just melted
1/2 cup dried dates, seeded and finely chopped into a paste
3 ripe bananas (1 1/4 cups), mashed well
1 1/2 cups grated carrots (about 3 medium)
1/2 cup plain Greek yogurt
2 eggs, lightly whisked

Preheat oven to 350 degrees Fahrenheit. Butter a standard 8-cup loaf pan (or 8×8 cake pan or four mini loaf pans) and line it with parchment paper.

In a small bowl, sift together the flour, baking powder, cinnamon, and salt. Stir in the walnuts and set aside.

Stir the dates into the melted butter, breaking up the dates with a knife or fork.

In a large bowl combine the bananas and carrots. Stir in the date-butter mixture, breaking up any  clumps as you go. Whisk in the yogurt and the eggs. Add the flour mixture and fold until everything just comes together. Spoon into the prepared pan (s). Bake for about 50 – 60 minutes (35-40 for mini loaf pans) or until a toothpick tests clean in the center of the cake.

Allow to cool for ten to fifteen minutes before removing to a wire rack. Eat within one day or two of baking. These loaves freeze well, so don’t be shy about saving a loaf for next weekend.

Monet

Anecdotes and Apple Cores